Showing posts with label canning. Show all posts

Sunday, October 27, 2013

Sunrise Jelly - Sweet and Spicy!


This jelly is easy to make but I caution against doing this on a cold or wet day. You will want to open all the windows because the peppers will burn something awful. Wear a paper mask, protective eye wear or eye glasses, and gloves when you start to process the chilies.


First make the peach jelly base.

6 cups of peeled, pitted, and finely chopped peaches; about 6 pounds. Add 1½ cups water.


Combine peaches (From Singer Farm Naturals) and water in a 8-quart stainless-steel pot. Bring to a boil. Reduce to medium-low heat and simmer for about five minutes. Remove from heat and skim off any foam with a stainless-steel spoon. Cover and allow to stand for about 20 minutes.

Strain the juice through a fine mesh sieve over a large bowl. Discard the pulp.

For the jelly, add back into the large pot: 3½ cups peach juice, adding ¼ cup lemon juice, 5 cups sugar, two boxes of pectin.
Raw milk herb farmer's cheese,
goat cheese, Spar's ham, and house
made spicy Sunrise Jelly quesadillas.

Wash the peppers well. I used a mix of five different colorful varieties from Plato Dale Farms. Trim, de-seed, rinse. Slice very thinly. Add to the pot of ingredients.

Bring to a boil, stirring gently with a silicon spatula. Boil hard for 15 minutes, stirring constantly. Lower to a simmer for 15 minutes. Return to a rolling boil for 15 minutes. Remove from heat and skim foam if necessary with a stainless-steel spoon.

Ladle the hot jelly into hot jars, leaving 1/2 inch headspace. Dry the lip, lid, and band tightly. Process for 15 minutes in a boiling-water canner. Set out and store in a cool dark pantry after the lids have "popped". It will take about one week to firm up in the pantry. You can put a completely cooled jar in the fridge and begin to use it in two to three days.

This recipe was inspired by the one found in Ball Complete Book of Home Preserving.


Wednesday, August 7, 2013

Naturally Fermented Dill Pickles


Nearly all store brand pickles are created with vinegar as the base as it guarantees a sour flavor and acts as a preservative. However, using vinegar instead of brine prevents natural fermentation from occurring. The live bacteria cultures that will grow, that turn pickles into a healthy probiotic food, are missing. Also, pickles that soak in vinegar for a long time are usually too sour and end up rather limp.

There are brands of naturally fermented pickles to be found in stores, although they can be expensive. Making naturally fermented pickles at home is pretty easy to do and is more fun than you might think. They will crunch, have an earthy tang, will be infused with garlic and dill and taste fresher than a factory made pickle.

Start with this easy recipe first but then be prepared to play with flavors and switching up veggies on the next bottles, any herb, spice and vegetable is fair game.

This recipe is for one 16 ounce jar and can easily be doubled. 

6-8 small (3-4 inches long) un-waxed cucumbers. Look for pickling or “Kirby” cucumbers which are an ideal size. 
1 1/2 cups filtered water
2 tablespoons sea salt (or other non-additive salt)
4-8 sprigs of fresh dill
2 cloves of garlic, peeled and cut in half a
1 wide-mouth 16-ounce glass canning jar (sterilized in boiling water and air-dried)

Optional seasonings: red pepper flakes, hot chiles, mustard seeds, coriander seeds, fennel seeds, celery leaves, bay leaves, fresh herbs, onion, cinnamon stick, cloves

Combine salt and water and let sit until salt dissolves

After washing the cucumbers, cut the tips off on both ends. Leaving the cucumbers whole, cutting them in half, spears, or coins is a matter of personal preference. I like coins best but will try long thin slices for sandwiches next time.

Tightly pack the the jar. Layering in the garlic and dill. The cucumbers will shrink a little during the pickling process.

Pour the salt water into the jar. It should completely cover the cucumbers.

Set the lid loosely on top of the jar, don’t seal it. Let the jar sit undisturbed at room temperature. You’ll know fermentation has begun when you see bubbles rising to the top of the jar and the water becomes cloudy. A thin layer of white scum may form on the surface of the water. This is harmless and can be scooped away with a clean spoon. 

It will take between 4 to 8 days before the pickles are done. Taste the pickles to check for texture and flavor. Once you’ve decided they’re done, tighten the lid and store the pickles in the refrigerator. Store for up to 2 months in the refrigerator, skimming as needed. If the pickles should become soft or begin to take on an off odor, this is a sign of spoilage and they should be discarded.

If the flavor of the pickles is not vinegary enough for you, try drizzling a little vinegar on the spears right before eating.


Wednesday, November 28, 2012

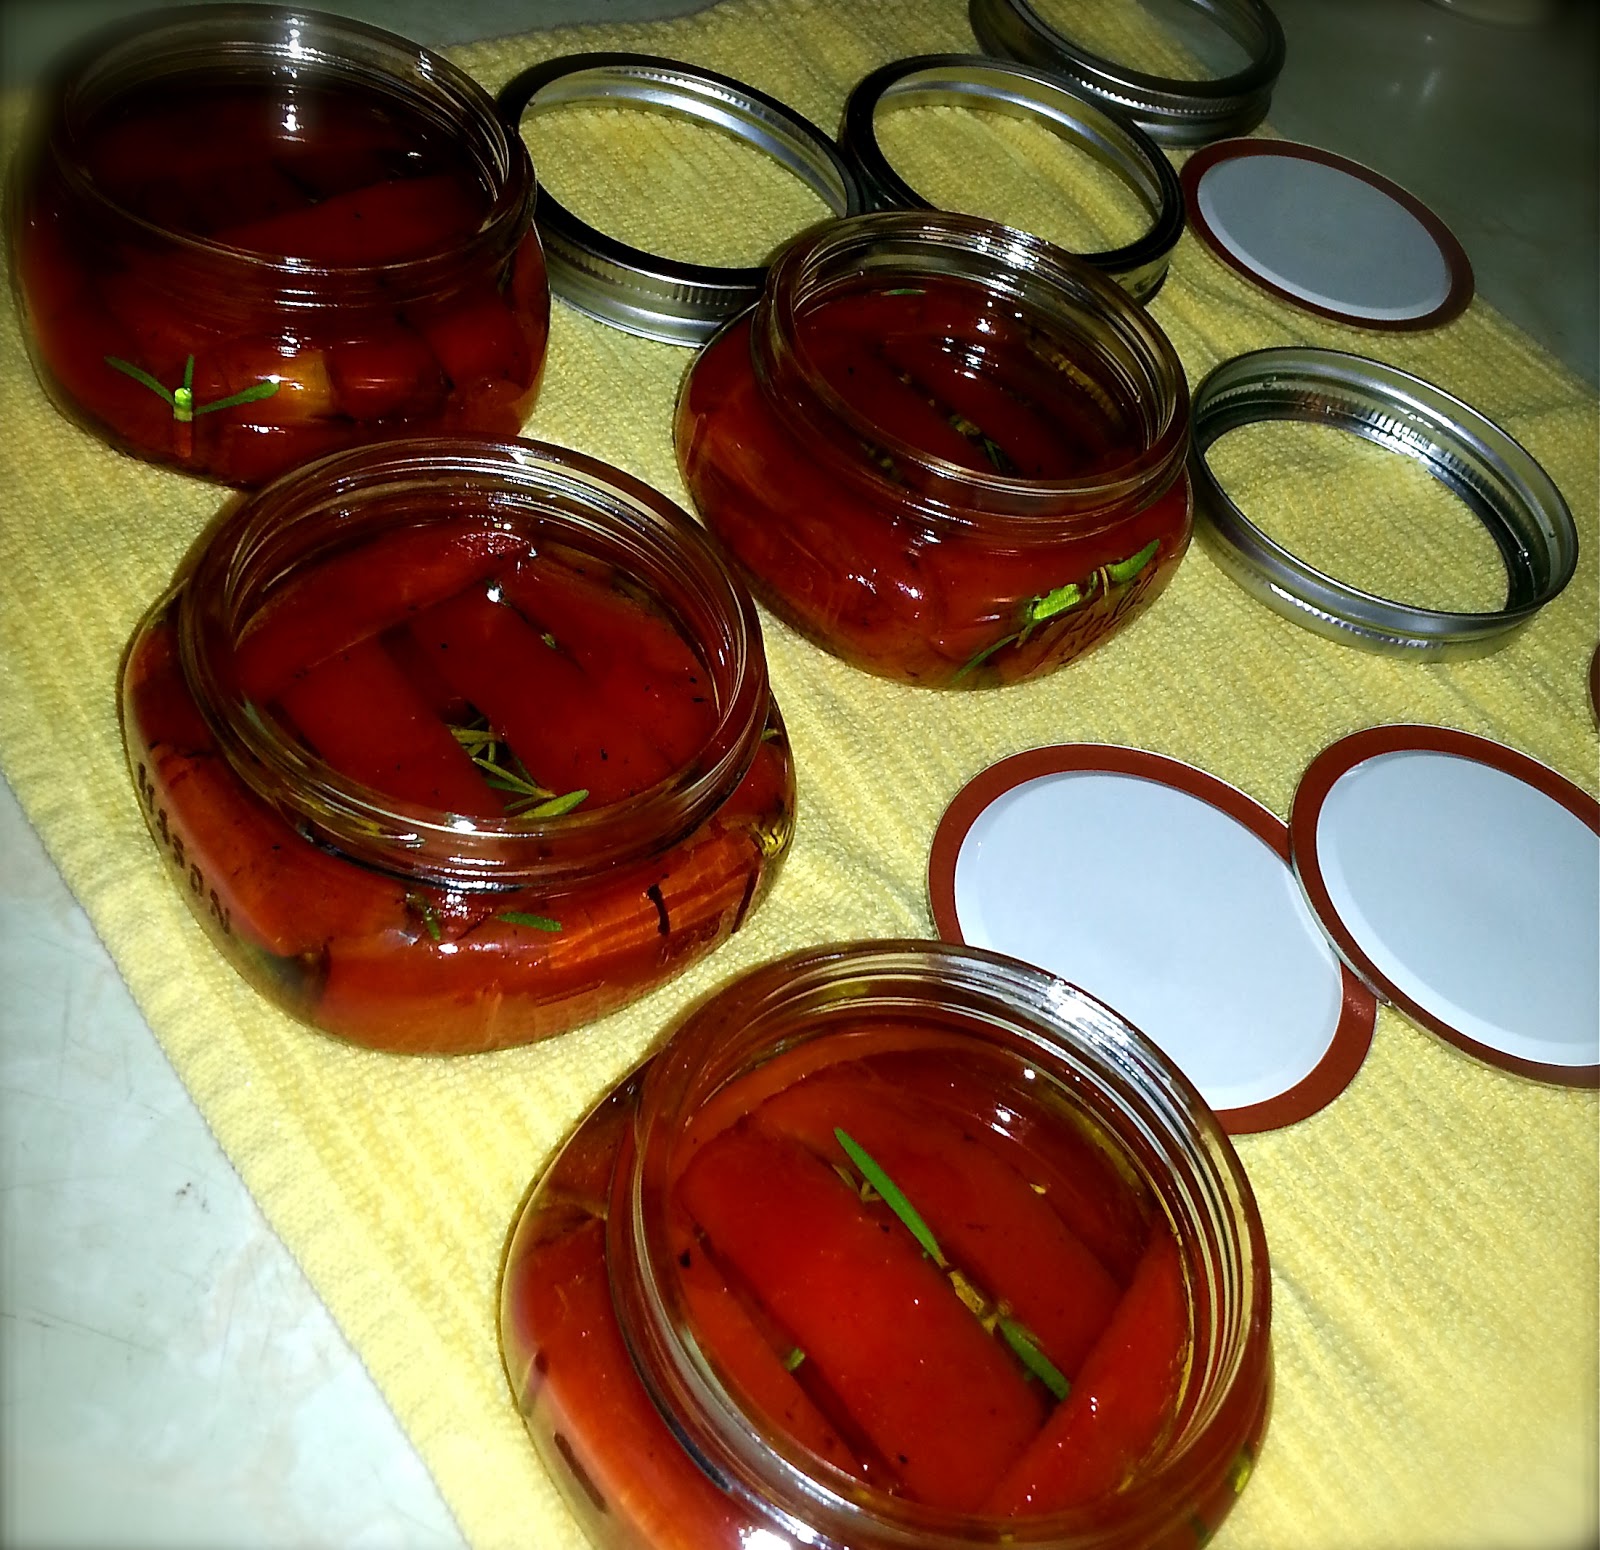
Olive Oil Packed Roasted Peppers

My friends, Rae and Suzy, came down from St. Catharines's to visit recently and while they were here, we packed roasted peppers together.

You start by cutting both ends off, removing the core and seeds. Then, using a paring knife, slice the white ribbed pith from the inside. Slice, but not all the way through, the inside of the pepper so it lays flat but does not separate. Using tongs hold the peppers over a flame either on your stove or using an outdoor grill. Set them aside to cool.

Boil the jars, lids, and bands to sanitize and set out to cool. Fill 1/3 of the jar with certified high quality olive oil. Add 1 tsp fresh rosemary.


Scrape the blackened portions off the peppers and then slice into 1 1/4 inch wide strips. Layer in the jars, adding oil, rosemary, and 1 tbls of pickling salt. Wipe the jar edges off very well, lid and band tightly.

The packed peppers will keep in the back on the the bottom shelf of your fridge for six months. If you want them to keep longer on a pantry shelf, can them (water or pressure).

Wednesday, September 19, 2012

Tomato Skin Powder or Flakes - Flavor Booster

Since the sauce class on Saturday 8th, I've had two sheets of tomato skins drying. These are tasty to add to your spice blends. The concentrated, almost roasted red pepper flavor is a great flavor booster. I was inspired by a post in You Grow Girl (a blog that has loads of great ideas) which was inspired by Liana Krissoff's 'Canning for a New Generation: Bold, Fresh Flavors for the Modern Pantry'.
Only use organic tomatoes, to ensure a wholesome product. Slide two tomatoes at a time for 30 seconds in boiling water and then dunk them in icy cold water. Slip the skins off and drain in a colander. The tomatoes can then be processed for sauce.

The skins can be laid out on waxed or parchment paper and dried in a sunny and dry location or on a parchment paper lined cookie sheet set at 200 degrees until crisp.

Break up several tbls of peels into small pieces and grind them in a spice grinder, though a very clean coffee grinder will work too.

Using a coffee grinder can be a challenge as the peels grind unevenly. Powder puffs up to make you sneeze and you end up with a mix of grinds and flakes.


To be honest, I didn't really mind this. Sprinkled on homemade Fettucini Alfredo, this would present a stunning dish.

Store the powder/flakes in a clean and dry glass apothecary jar or vacuum sealed jar. Keep it in a dark, cool, and dry cabinet.


Tuesday, September 11, 2012

Blood Orange Marmalade

5 thin skinned oranges. Pictured to the right are organic blood oranges. Select only organic fruits, as the skins are added to the mix. If you would like, you can add one lemon to this recipe.

4 1/2 cups of raw and/or organic cane sugar. Cane sugar is best for jams, jellies, and marmalades. Anything else can lead to a bitter and runny spread.

2 1/2 cups of filtered water.

1 box of Sure Jell Premium Fruit Pectin

8 wide mouth half pint jars with new lids and bands. Bands can be reused, but you will need a new lid as the rubber seal is less reliable after the first use and could lead to spoiling.
Scrub the fruit very well! Quarter and cut away the white bitter pith down the center, removing 1/8 from the top and bottom of the peel, as well as the seeds.

Using a mandolin slicer over a large bowl, place the quartered fruit pulp side down and slice. Dispose of the excess peel. Be certain to get the juice into the bowl, wasting as little as possible. And watch your fingers! Slicers and knives can do a doozy on your fingertips.

If you do not have access to a slicer, using a well sharpened knife, cut the fruits into slivers. Remove excess center pith, seeds, and the cap ends of the peel.

Add the water and sugar to the fruit and mix well. Pour into a enamel lined pot, using a silicon scraper/spatula remove every last drop, and then set to boil for twenty minutes. Sprinkle in the pectin and stir well. Scrape down the sides frequently. Reduce to a simmer and cover for approximately thirty-five minutes, scraping the sides and bottom every five minutes.

Wash and sanitize the jars, lids, and bands. Start the canning pot to boil.

Evenly pour out the marmalade into the jars. Be certain the rim is clean and dry before placing the still warm and completely dry lid and band on it. Using a hand towel to hold the base while tightening with a rubber jar opener/ tightener provides traction, ensuring that the band is on really tight.


Place in the canning pot, cover and boil for fifteen minutes. Turn off the heat, remove the lid, let sit for ten more minutes and then using the canning tongs, remove the jars and set on dish towels to dry. When the lids pop they are sealed. Allow to cool for at least one hour before storing in a cool dark pantry or cupboard.

There are all sorts of recipes that call for overnight soaks, excessive trimming, and more, but I'm telling you - you don't need any of those things. This recipe turns out just the right blend of sweet and bitter, it spreads beautifully, the color is like a sunset, and the peels are tender. As with all orange marmalade recipes, it will take about a week or two for the spread to thicken or gel. It is still perfectly fine and spreads nicely, it's like honey the way it pours and spreads.

I poured the excess into a little dish and placed it in the refrigerator to thicken over night and it was perfect on my toast in the morning.

Monday, August 13, 2012

Canned Salsa Verde


8 tomatillos
1 onion
4 large hot peppers of your choice
6 cloves of garlic
lime juice and pulp
fistful of cilantro
1 tbls salt
2 tbls olive oil
2 tsp cane sugar 


Slice and deseed the peppers. Roast the tomatillos and peppers. Cool and chop. Add all of the ingredients to a food processor and blend to desired consistency, adding one or two teaspoons of malt vinegar to thin. This produces enough for four half pint jars.


Boil four half pint jars, the lids and seals. Set up canner with metal basket and ten cups of water to boil. Cover. Drain jars, lids, and seals. Wipe the rubber seal well. Fill the jars with the salsa, leaving 1/2 inch from the top. Wipe the jar edge well. Place on seal and then lid, screwing tightly. When all four are filled, place in the boiling water and cover, boiling for ten minutes. Turn off the heat and uncover. Remove after five minutes. Set on a towel and let cool. 

Over the next hour the seals will pop. If you don't hear anything you can test the tops by pressing on them. If they move, they're not ready. If they are on there nice a tight, once cooled, you can stack them in your pantry. They're good for a year.


Saturday, July 14, 2012

Jams, Jellies, Pickles & Sauce by JJ's Jams

 A few nights ago, as my family and I were walking back home after watering and weeding our Grant Street garden, we passed two women loading their car full of canned jellies.

We got to chatting and they handed us a jar of rhubarb jelly. Which I promptly opened to smell and taste. It's pale red color and consistent texture were perfect. It was sweet and mellow and I looked forward to trying it on toast.
I visited Sarah of B. Ferrante's on Friday and she gave me a bâtard to try.

This morning I went to the Bidwell Farmers Market and made sure to stop and see Max at the First Light Farm & Creamery tent. (Galette, Chevre Cauliflower and Grouper Chowder) I purchased a pack of the Thyme & White Pepper Double Cream Chevre.
This toast was thickly layered with the chevre and then the jelly. The blend of pungent cheese with the delicate jelly was saporific.
If you are interested in trying out JJ's Jams for yourself, click this link and print out their order form.

Wednesday, September 14, 2011

Green Tomato and Raspberry Jam

8 cups of quartered small green tomatoes

 1 pack of Brown's Berry Patch Raspberries

Sprinkle and mix in well 6 tbls Ball Real Fruit Pectin. Add to pot and bring to a boil. Stir frequently. It will all get juicy and brown slightly, but don't stop stirring, because you don't want it to stick and burn and it needs to get to a roiling boil.

Lower the heat so it stops boiling. Add 6 2/3 cups of sugar, mixing every two cups in well. Bring it back to a boil and stir until it starts to thicken.

 Jar and follow the canning directions I gave for the Pickled Peppers. Allow for two weeks to set. Some of them may still be juicy on the shelf, but by the time you transfer one to the fridge, the cold will set it.

Sunday, September 11, 2011

Day 11 - Pickled Hot Peppers and Not Making Dinner


My friend Susan offered up bags of the most amazing red hot peppers I have ever seen. They made my eyes weep, they were so hot!


So I made the only thing I could think of, given the number of peppers - Pickled Peppers.

I started the canning pot to boil with five pint jars and their caps to sanitize them. Then placed the rubber edged lids in a small pot to simmer.

In another pot I added 3 cups of vinegar, 1 cup of sugar, 3 tbls of slightly cracked peppercorns, 1 tlbs dry mustard, 2 tbls celery salt. and brought this to a boil to dissolve the sugar.

 The peppers were washed, trimmed, sliced and layered in a large bowl with 1/2 cup of canning salts mixed in well. Any salt without iodine will work.

The peppers were added to the salt sugar mix and boiled for five minutes.

Then they were added to the jars, leaving aprox. 1/2 inch head room to allow for proper sealing.

Then aprox 1/2 to 2/3 cup of the pickling juice was added.

The lids were gently dried and placed on top of dried glass to ensure a tight seal. Then the bands went on and were fingertip tighened.
 The jars were added, add water to cover completely by no more than 2 inches. Boil for 10 minutes with the lid on, then remove the lid and continue to boil for five minutes.
Remove the jars and place them on a dish towel. Over the next thirty minutes their lids will make a pop noise as they fully seal.


Try not to move them around too much for the next six hours as they fully cool.


These are supposedly best in another 4 to 6 weeks, but I think that's nuts, they were perfect when they went in, they'll be perfect when they come out, even if that ends up being tomorrow evening.

And so between doing this and making a batch of Basil Castile Soap I was exhausted and was thrilled with take out. Even I give myself permission to honor my energy levels, and so should you. Don't be everything to everyone, just honor you and others will be pleased with the outcome just the same.